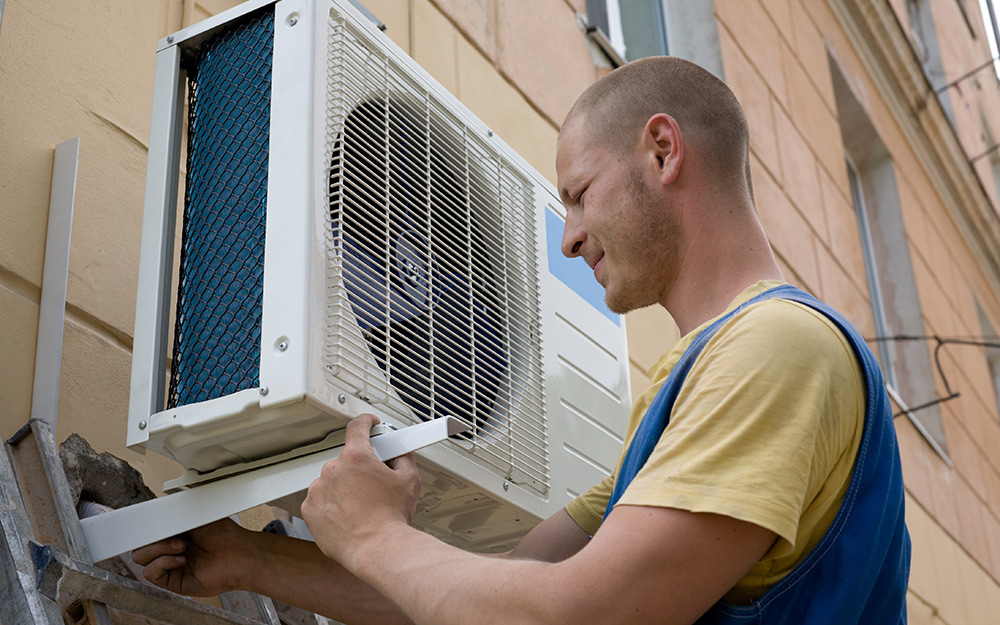
Hey there, fellow DIY enthusiasts! Summer is coming in hot, and nothing beats the scorching heat like a perfectly functioning air conditioner. But before you call in the professionals for installation, did you know that wiring an AC unit yourself is a project you can totally conquer?
That’s right! With a little guidance and a dash of confidence, you’ll be enjoying that cool breeze in no time. In this comprehensive guide, we’ll break down the process of air conditioner wiring, empowering you to tackle this project like a seasoned pro. Let’s get started!
Understanding the Basics
Before we dive into the nitty-gritty, let’s familiarize ourselves with the fundamentals of AC wiring. Most standard air conditioners, particularly those beyond the small window units, operate on a 240-volt circuit. This differs from your regular household outlets, which typically run on 120 volts.

What does this mean for you?
It means you’ll need to establish a dedicated 240-volt circuit specifically for your air conditioner. This involves installing a new 240-volt circuit breaker in your main electrical panel and running the necessary wires to an outdoor air-conditioning disconnect switch.
Think of the disconnect switch as a safety valve for your AC unit. It should be easily accessible and within sight of the condensing unit, allowing you to quickly cut off power if needed.

Safety First: Your Non-Negotiable Guide to AC Wiring
Before we proceed, let’s emphasize the golden rule of any electrical project: Safety always comes first! Electricity is no joke, and taking the necessary precautions is paramount to preventing accidents.
Here are some essential safety tips to keep in mind:
- Power Down: Always, and we mean always, turn off the circuit breaker that controls the area where you’ll be working before you touch any wires. Double-check that the power is off using a non-contact voltage tester.
- Wire Gauge Matters: Using the correct wire gauge is crucial for safety. The wire gauge refers to the thickness of the wire, and using a wire that’s too thin for the electrical load can lead to overheating and fire hazards. Consult the manufacturer’s instructions or a qualified electrician to determine the appropriate wire gauge for your AC unit.
- Secure Connections: Loose connections are a recipe for disaster when it comes to electrical work. Ensure all wire connections are tight and secure to prevent arcing, which can lead to fires.
- Inspect Your Wires: Before installing any cables, carefully inspect them for any signs of damage, such as cuts, nicks, or fraying. Damaged cables can pose a serious safety risk and should be replaced immediately.
- No Wire Peek-a-Boos: When securing wire caps, make sure no exposed wires are peeking out. For added safety, wrap electrical tape around the wire cap splices to ensure a completely secure connection.

Gearing Up: Your Essential AC Wiring Toolkit
Now that we’ve covered the safety essentials, let’s gather the tools you’ll need to embark on your AC wiring adventure. Here’s your essential toolkit:
- Phillips Screwdriver: Your trusty sidekick for loosening and tightening screws.
- Utility Knife: Perfect for stripping insulation from wires and making precise cuts.
- Wire Stripper: This handy tool makes stripping insulation from wires a breeze, ensuring clean and accurate cuts without damaging the wire strands.
- Pliers: Essential for gripping, twisting, and pulling wires.
- Screw-on Wire Connectors: Also known as wire nuts, these are essential for joining wires securely.
- Non-Contact Voltage Tester: Your safety net for verifying that wires are not live before you touch them.
- Flexible Nonmetallic Conduit: This protective tubing helps safeguard your wires from damage.
- Electrical Cable: Choose the appropriate gauge based on your AC unit’s requirements.

Step-by-Step Guide: Wiring Your Air Conditioner
With your safety gear on and your toolkit ready, let’s break down the AC wiring process into manageable steps:
Step 1: Establishing the Circuit
- Turn off the main power to your house at the main electrical panel.
- Locate an empty slot in your electrical panel for the new circuit breaker.
- Install the new 240-volt circuit breaker according to the manufacturer’s instructions.
- Run the electrical cable from the service panel to the location of your air conditioner disconnect switch.
- Connect the cable to the new circuit breaker in the panel.
- Leave the breaker in the OFF position for now.
Step 2: Connecting the Disconnect Switch
- Mount the air conditioner disconnect switch on an exterior wall near the AC unit. Ensure it’s at a safe and accessible height.
- Feed the electrical cable from the service panel into the disconnect switch through the provided knockout hole.
- Prepare a length of cable to run from the disconnect switch to the AC unit’s control panel.
- Insert this cable into a flexible nonmetallic conduit for protection.
- Feed the ends of the conduit through the knockout holes in both the disconnect switch and the AC unit’s control panel.
- Leave enough slack on both ends of the cable to make connections comfortably.
- Securely affix the conduit to both boxes using appropriate connectors.
Step 3: Wiring the Disconnect Switch
- Using your utility knife, carefully cut about six inches of insulation from the ends of both cables inside the disconnect switch box.
- Separate the individual wires within each cable. You should have a red wire, a black wire, and a bare or green wire (ground wire).
- Double-check that the power is off at the panel by testing the red and black wires coming from the panel with your non-contact voltage tester.
- Strip about an inch of insulation from the ends of all the wires using your wire strippers.
- Connect the wires from the service panel to the corresponding wires from the AC unit cable using wire connectors. Match colors: black to black, red to red, and ground to ground.
- Ensure all connections are tight and secure.
Step 4: Wiring the AC Unit Control Panel
- Locate the main terminals inside the AC unit’s control panel.
- Strip the ends of the black and red wires coming from the disconnect switch.
- Make clockwise hooks on the end of the stripped black and red wires.
- Hook the wires onto the terminal screws inside the control panel, matching colors.
- Tighten the terminal screws securely.
- Locate the ground screw on the AC unit’s housing.
- Connect the bare or green ground wire to the ground screw and tighten securely.
Step 5: Final Check and Power Up
- Double-check all connections to ensure they are tight and secure.
- Carefully tuck all wires into the boxes to prevent any loose connections.
- Close the covers of the disconnect switch and the AC unit’s control panel.
- Turn on the circuit breaker at the main electrical panel.
- Test your AC unit to ensure it’s working properly.
When to Call in the Pros
While wiring an air conditioner is a manageable DIY project for many, there are instances when it’s best to leave it to the professionals. If you encounter any of the following situations, don’t hesitate to call a qualified electrician:
- Internal Wiring: If your AC unit requires any internal wiring connections, it’s best to leave this to a qualified electrician to avoid potential damage to the unit.
- Complex Electrical Systems: If your home has a complex electrical system or you’re unsure about any aspect of the wiring process, it’s always safer to consult a professional.
- Code Compliance: Electrical codes can vary depending on your location. A qualified electrician will be familiar with local codes and ensure your installation meets all safety standards.
Congratulations! You’ve successfully wired your air conditioner like a true DIY champion. Now, sit back, relax, and enjoy the cool comfort of your hard work. Remember, safety is paramount in any electrical project, so always prioritize caution and don’t hesitate to seek professional help when needed.
Resources:
- National Electrical Code (NEC): https://www.nfpa.org/NEC
- Electrical Safety Foundation International (ESFI): https://www.esfi.org/
- Find a Qualified Electrician: https://www.angi.com/


