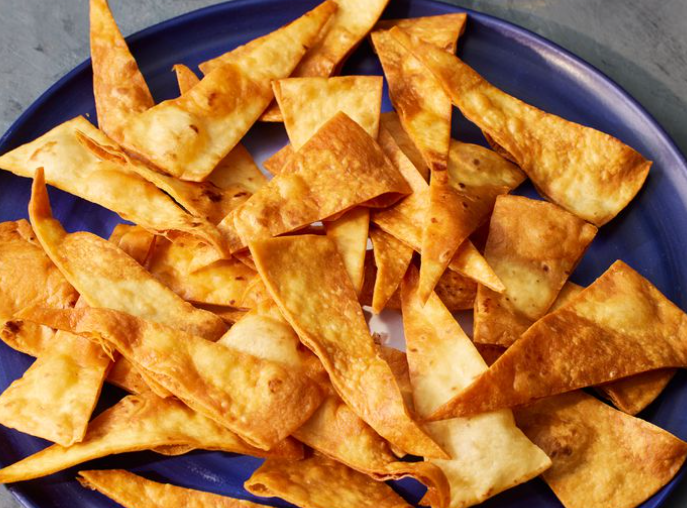
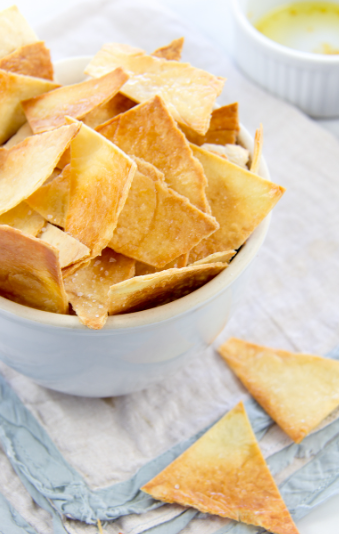
Hey everyone, Emma here! As a food blogger, I’m always on the hunt for delicious and easy recipes to share with you all. And let me tell you, this one is a game-changer. We’re ditching the store-bought bags and diving headfirst into the wonderful world of homemade fried flour tortilla chips.
Trust me, once you taste the warm, crispy goodness of these chips fresh out of the fryer, you’ll never go back. They’re incredibly simple to make, and the flavor? Let’s just say it puts those mass-produced chips to shame.
Ready to impress your friends and family with your newfound chip-making skills? Let’s get started!
Why You’ll Love This Recipe
- Unbeatable Flavor: Freshly fried tortilla chips have a depth of flavor and satisfying crunch that you just can’t get from a bag.
- Easy to Customize: Season them however you like! From classic salt and pepper to zesty lime and chili powder, the possibilities are endless.
- Budget-Friendly: Making your own chips is surprisingly affordable, especially compared to constantly buying those gourmet bags.
- Fun for the Whole Family: Get everyone involved! Kids will love cutting the tortillas and watching the chips sizzle to golden perfection.
Understanding the Ingredients
Before we fire up the stove, let’s take a quick look at our star players:
- Flour Tortillas: The base of our chips! Opt for standard-sized tortillas for the best results.
- Vegetable Oil: We’ll be shallow frying our chips, so choose an oil with a high smoke point like vegetable, canola, or peanut oil.
- Salt: The essential seasoning! Feel free to adjust the amount to your liking.
Pro Tip: For an extra flavor boost, try experimenting with different types of salt like sea salt, kosher salt, or even flavored salts.
Gearing Up: Tools You’ll Need
- Sharp Knife or Pizza Cutter: For slicing those tortillas into perfect triangles.
- Heavy-Bottomed Skillet or Dutch Oven: This will ensure even heating and prevent those pesky hot spots.
- Thermometer: A candy or deep-fry thermometer is crucial for achieving that perfect golden brown crispiness.
- Slotted Spoon or Tongs: For safely fishing out those golden chips from the hot oil.
- Paper Towel-Lined Plate or Baking Sheet: To absorb excess oil and keep your chips nice and crispy.
Let’s Get Frying: A Step-by-Step Guide
- Prep Your Tortillas: Using a sharp knife or pizza cutter, slice each tortilla into 8 equal triangles.
- Heat the Oil: Pour about 1/2 inch of oil into your skillet or Dutch oven. Heat over medium heat until it reaches 360 degrees Fahrenheit (182 degrees Celsius). Use your thermometer to check the temperature—accuracy is key!
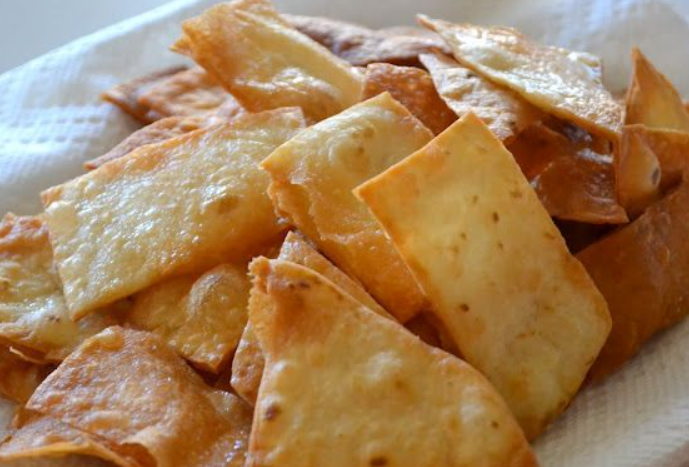
- Fry in Batches: Carefully place a handful of tortilla triangles into the hot oil, making sure not to overcrowd the pan. Fry for about 2-3 minutes, turning frequently, until they turn a beautiful golden brown and crispy.
- Drain and Season: Using a slotted spoon or tongs, remove the chips from the oil and transfer them to your paper towel-lined plate or baking sheet to drain. Sprinkle generously with salt while they’re still hot.
- Repeat: Continue frying the remaining tortilla triangles in batches until they’re all perfectly golden and crispy.
Pro Tip: Don’t overcrowd the pan! Frying in batches ensures that the oil temperature remains consistent, resulting in evenly cooked chips.
Taking Your Chips to the Next Level: Flavor Variations
Here’s where things get really fun! Once you’ve mastered the basic recipe, the flavor possibilities are endless:
- Spicy: Toss your hot chips with chili powder, cayenne pepper, or your favorite hot sauce for a fiery kick.
- Zesty: Squeeze fresh lime juice over the chips and sprinkle with a pinch of chili powder and salt.
- Cheesy: Dust the chips with grated Parmesan cheese, cheddar cheese powder, or nutritional yeast for a cheesy flavor bomb.
- Herby: Add a sprinkle of dried herbs like oregano, basil, or rosemary for an aromatic twist.
Serving Up Your Crispy Creations
These homemade chips are best enjoyed immediately while they’re still warm and crispy. Here are a few serving suggestions:
- Classic Dip Duo: Serve alongside your favorite salsa and guacamole for a crowd-pleasing appetizer.
- Soup or Chili Topper: Crumble the chips over your next bowl of soup or chili for a satisfying crunch.
- Nacho Night Upgrade: Use your homemade chips as the base for epic loaded nachos.
- Salad Crunch: Crumble a few chips over your salad for a textural and flavorful element.
Storing Leftovers (If You Have Any!)
While it’s hard to resist devouring these chips in one sitting, you can store any leftovers in an airtight container at room temperature for 1-2 days. However, keep in mind that they won’t be quite as crispy as when they’re freshly made.
Nutritional Considerations
It’s important to be mindful of the nutritional content, especially when it comes to fried foods. Here are a few things to keep in mind:
- Fat Content: Fried foods naturally contain more fat than baked or air-fried alternatives.
- Sodium Intake: Be mindful of your salt intake, especially if you’re watching your blood pressure.
- Moderation is Key: Enjoy these chips in moderation as part of a balanced diet.
For those seeking healthier alternatives:
- Baked Tortilla Chips: Check out this recipe for a lighter take on tortilla chips: https://www.allrecipes.com/recipe/244540/fried-flour-tortilla-chips/
- Air Fryer Tortilla Chips: This method uses less oil while still delivering a satisfying crunch: https://www.allrecipes.com/recipe/244540/fried-flour-tortilla-chips/
Final Thoughts
Making your own fried flour tortilla chips is easier than you might think, and the results are absolutely worth the effort. With just a few simple ingredients and some basic kitchen tools, you can enjoy warm, crispy, and flavorful chips that are perfect for any occasion. So ditch the bag, embrace your inner chef, and get ready to impress your taste buds!