There’s something magical about the aroma of sugar melting on the stovetop, transforming into a golden, buttery concoction that promises pure delight. That’s the magic of homemade butterscotch candy – a treat that evokes childhood memories and satisfies the soul. Today, we’re diving deep into the world of butterscotch, exploring a recipe that’s simple, satisfying, and oh-so-delicious.
This isn’t just about following instructions; it’s about embarking on a culinary adventure. So, gather your ingredients, put on your apron, and let’s create some sweet memories together!
Crafting Butterscotch Bliss: A Step-by-Step Guide
This recipe is a testament to the fact that sometimes, the simplest things in life are the most rewarding. With just a handful of pantry staples and a bit of patience, you’ll be rewarded with a batch of glistening, golden butterscotch squares that are impossible to resist.
Ingredients You’ll Need:
- ½ cup packed light brown sugar: The star of the show, brown sugar provides that signature caramel-like flavor and a hint of molasses depth.
- ¼ cup unsalted butter: Butter adds richness, a velvety texture, and enhances the overall flavor profile.
- ½ cup granulated sugar: Granulated sugar contributes to the candy’s texture and sweetness.
- ½ cup water: Water dissolves the sugars and helps create the syrup base.
- 2 teaspoons white vinegar: Vinegar plays a crucial role in preventing sugar crystallization, ensuring a smooth and glossy finish.
- 1 pinch of salt: A touch of salt balances the sweetness and elevates the other flavors.
- ½ teaspoon pure vanilla extract: Added at the end, vanilla extract rounds out the flavor profile with a warm, aromatic note.
Equipment for the Sweet Task:
- Medium saucepan: This will be your melting pot for the sugary concoction.
- 10×15-inch baking pan: A spacious pan ensures even cooling and easy cutting.
- Candy thermometer: Precision is key when it comes to candy making, and a thermometer guarantees perfect results.
- Butter or nonstick cooking spray: Greasing the pan prevents the candy from sticking.
- Heat-resistant spatula or wooden spoon: For stirring the mixture and ensuring even heat distribution.
Let’s Get Cooking:
Prepare the Stage: Generously grease your 10×15-inch baking pan with butter or nonstick spray. This step is crucial to prevent your hard-earned candy from stubbornly clinging to the pan.
Create the Butterscotch Symphony: In your trusty medium saucepan, combine the brown sugar, butter, granulated sugar, water, vinegar, and salt. Stir gently to combine.
The Boiling Ballet: Place the saucepan over medium heat and bring the mixture to a boil, stirring occasionally. Once it reaches a rolling boil, cover the saucepan with a lid and let it bubble away for about 3 minutes. This allows the steam to wash down the sides of the pan, preventing sugar crystals from forming and ensuring a smooth texture.
The Unveiling: After 3 minutes, remove the lid and allow the mixture to continue cooking without stirring. This is where your candy thermometer comes into play. You’re aiming for the “hard-crack” stage, which falls between 270 to 290 degrees Fahrenheit (132 to 143 degrees Celsius). This temperature range ensures that the candy sets properly and achieves that satisfyingly firm yet chewy texture.
The Test of Time: To test if your candy has reached the hard-crack stage, carefully drop a small amount of the syrup into a bowl of cold water. If it forms hard, brittle threads that solidify immediately, you’ve hit the mark! If not, continue cooking and test again in a minute or two.
The Vanilla Embrace: Once your syrup has reached the hard-crack stage, remove the saucepan from the heat and stir in the vanilla extract. Be careful, as the mixture will be very hot.
The Grand Finale: Pour the molten butterscotch into your prepared baking pan, spreading it evenly with the back of your spatula. Allow the candy to cool and harden completely at room temperature. This will take about 20-30 minutes.
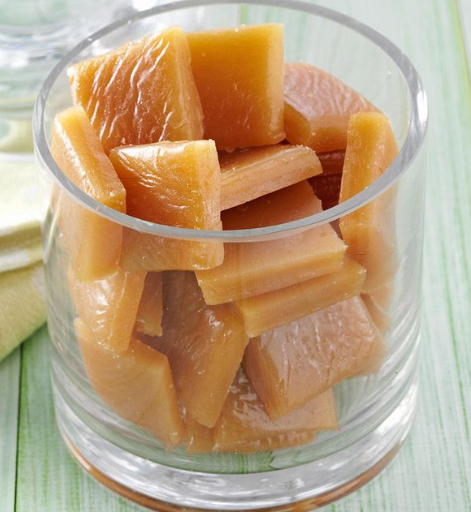
The Sweet Reward: Once the butterscotch is completely cool and firm, use a sharp knife to cut it into bite-sized squares.

Unveiling the Science Behind the Sweetness:
The magic of butterscotch lies in the fascinating science of sugar crystallization. When sugar is heated with water, it dissolves and forms a syrup. As the syrup cooks and the temperature rises, water evaporates, increasing the sugar concentration.
The addition of vinegar, an acid, plays a crucial role in this process. It breaks down some of the sucrose (table sugar) into glucose and fructose, preventing the formation of large sugar crystals that would result in a grainy texture. This process, known as inversion, ensures a smooth and glossy finish for your butterscotch candy.
Tips for Butterscotch Perfection:
- Use a heavy-bottomed saucepan: This ensures even heat distribution and prevents scorching.
- Avoid stirring after the initial boil: Stirring can encourage crystallization, leading to a grainy texture.
- Use a clip-on candy thermometer: This allows for accurate temperature monitoring without having to hold the thermometer.
- Don’t be afraid to experiment: Try adding a pinch of sea salt for a salted butterscotch twist, or incorporate chopped nuts for added texture and flavor.
Beyond the Basic Butterscotch: Exploring Flavor Variations
While the classic butterscotch flavor is eternally satisfying, don’t be afraid to get creative and explore exciting variations:
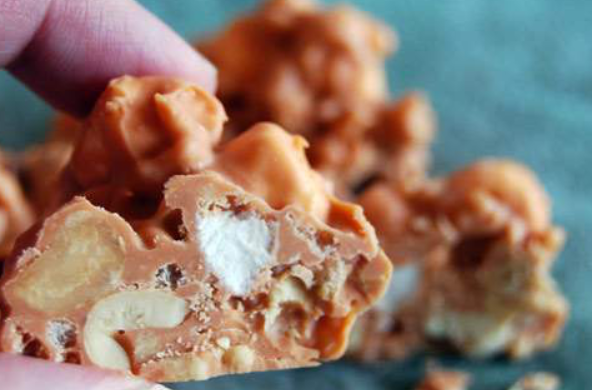
- Nutty Delight: Stir in ½ cup of your favorite chopped nuts, like pecans, walnuts, or almonds, to the melted butterscotch before pouring it into the pan.
- Chocolate Decadence: Drizzle melted dark or milk chocolate over the cooled butterscotch squares for an irresistible salty-sweet combination.
- Sea Salt Sophistication: Sprinkle a pinch of flaky sea salt over the warm butterscotch before it hardens for a gourmet touch.
FAQs: Answering Your Butterscotch Queries
Q: My butterscotch turned out too hard and brittle. What went wrong?
A: This usually indicates that the syrup was cooked to a temperature higher than the hard-crack stage. Make sure to use a reliable candy thermometer and monitor the temperature carefully.
Q: My butterscotch is grainy and not smooth. How can I fix this?
A: A grainy texture suggests that the sugar crystallized during the cooking process. This could be due to several factors, including stirring after the initial boil, not using enough vinegar, or cooking the syrup at too high a temperature.
Q: Can I substitute the white vinegar with something else?
A: While white vinegar is the most common acid used in candy making, you can substitute it with an equal amount of lemon juice or cream of tartar.
Conclusion: Embracing the Joy of Homemade Treats
Making your own butterscotch candy is a rewarding experience that connects you to the simple pleasures of homemade goodness. It’s a testament to the fact that with a little effort and a whole lot of love, you can create something truly special in your own kitchen. So, gather your ingredients, embrace the sweet chaos, and savor the delightful journey of transforming humble ingredients into pure butterscotch bliss.
External Resources for Further Exploration: